
Positive Material Identification (PMI)
What Is PMI?
Positive Material Identification (PMI) is a fast and non-destructive testing (NDT) method for verifying the elemental composition and grade name alloys.
PMI is used to verify that supplied materials conform to the required standards and specifications. Handheld X-ray fluorescence is the most common PMI method, it is portable, cost-effective and allows PMI to be performed in the field, production floor or in the lab.
Positive material identification (PMI) is an essential non-destructive testing (NDT) method used to verify that supplied materials conform to required standards and specifications.
Specifically, PMI is used to confirm that the elemental composition of the metallic parts contains the correct ratios of key elements, which ensures that material properties such as corrosion resistance meets the requirements.
PMI is needed for both quality control and safety compliance and is an integral part of production and asset integrity management across many industries including oil and gas, power generation, chemical, pharmaceutical, nuclear, aerospace and metal fabrication.
Material verification can be performed on-site before the parts go into the production process or for final products. Retroactive PMI is used to test in-service process equipment and piping systems. PMI can be utilized on a variety of part sizes – from large complex parts to things as small as the weld fill material or small fasteners.
Handheld X-ray Fluorescence (XRF) is the most common method used for PMI as the portability of handheld equipment faciliates PMI directly on-site at the production plant or factory floor. Handheld XRF spectrometers quickly scan the materials and provide information on the samples elemental composition and alloy grade name in seconds.
The Purpose of PMI
- Ensures that products and components have been manufactured using the correct alloy
- Identifies potentially mixed-up alloys
- Ensures materials conform to the correct standard and specification
- Ensures welded components have used the correct filler material
- Helps find the cause of failure to avoid future failure or accidents (Cause of Failure PMI)
- Ensures compliance with local government and legal requirements
- Reduces chance of accidents and risk of company liability with documented safety standards
Why is PMI Important?
One of the most common causes of industrial accidents is failures in mechanical integrity. Examples of this include rupture of pressurized systems, stress corrosion cracking, flow accelerated corrosion especially in power/nuclear plant technology, and insufficient strength of welded joins.
Positive material identification can prevent potential product failure in manufacturing. At oil and gas, power generation and pharmaceutical plants, pre-service and in-service inspection of critical components and welds with PMI can prevent breakdown and its potentially costly and dangerous consequences.
PMI testing means that companies can make sure that every single part in their system meets specifications, critical replacement parts are the right alloy grade and all new materials are exactly what they should be. This important step can be the key difference between seamless operations and catastrophic safety failures.
Reccomended Practices for PMI
PMI is a widely adopted non-destructive testing method and there are several standards and recommended practices for it.
Recommended PMI guidelines for alloy quality assurance and verification via PMI using handheld XRF and a range of other techniques includ:
The American Petroleum Institute: API RP 578 – Material Verification Program for New and Existing Alloy Piping Systems.
American Society for Testing and Materials: ASTM E1476 is a Standard Guide for Metals Identification, Grade Verification, and Sorting.
TITAN Handheld XRF for Fast, Confident PMI
Positive Material Identification often needs to happen directly where materials are received, installed, or maintained.
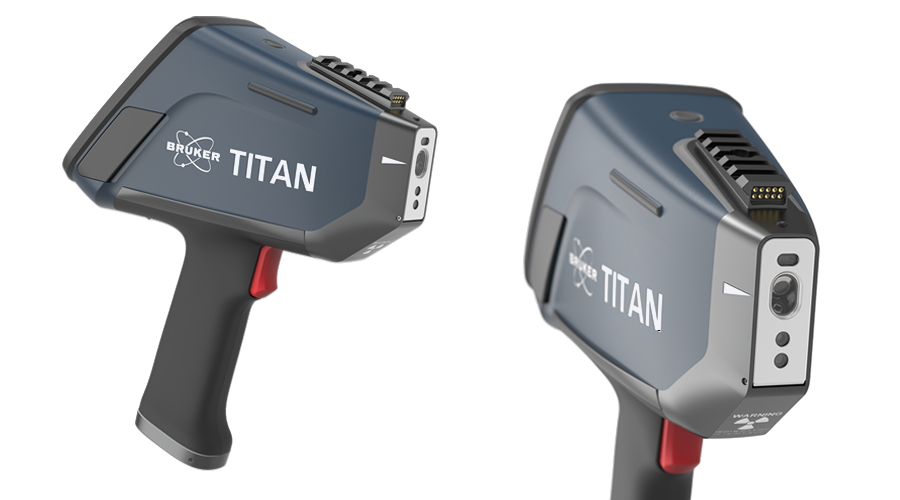
The TITAN handheld XRF analyzer is a PMI-focused solution that identifies alloy grade and verifies compliance within seconds, based on factory calibrations using traceable standards.
Built for routine industrial work, TITAN is:
- Designed for efficient, non-expert use with guided touchscreen workflows, simple point-and-shoot measurements and hot-swap battery capability to maximize uptime during inspections.
- Built for industrial environments with advanced ingress protection against dust, chemicals and water, a shock-resistant casing and patented TITAN Detector Shield™
- Ultra fast and reliable with an advanced XRF engine, graphene-window detector and optimized measurements.


